


| |
|
|
|
|
|
|
|
|
| |
|
|
|
|
|
|
|
|
| |
|
|
|
|
|
|
|
|
| |
|
|
|
|
|
|
|
|
| |
|
|
|
|
|
|
|
|
| |
|
|
|
|
|
|
|
|
| |
|
|
|
|
|
|
|
|
| |
|
|
|
|
|
|
|
|
| |
|
|
|
|
|
|
|
|
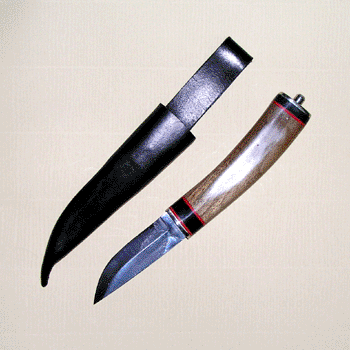
Making instructions for The Hythe
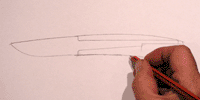
 Trace around the complete blade blank onto a sheet of heavy paper.
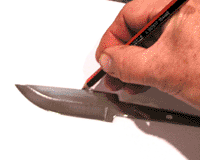
 Plan your shape and add to the outline of the blade
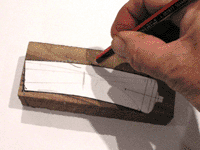
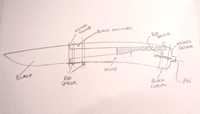 Select your materials and annotate so that you can refer to this plan later,
click for larger view
Select your materials and annotate so that you can refer to this plan later,
click for larger view
 Cut
out the shape of the wooden section, transfer to your selected wood which should
be approximately the right thickness, if not cut down before going any further
Cut
out the shape of the wooden section, transfer to your selected wood which should
be approximately the right thickness, if not cut down before going any further
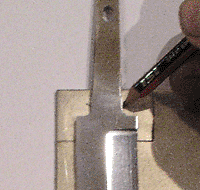
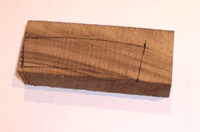 The block of wood prior to any other marking work, note the angle at both ends
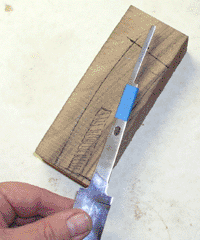 Mark
the tang off to the required depth and also mark this on the wood.
Mark
the tang off to the required depth and also mark this on the wood.
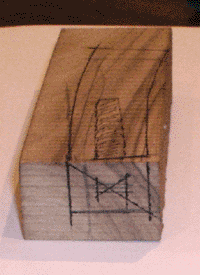
Taking into account the ferule and spacers. Then grind away as necessary, keep
testing against your shape
 Mark the end section so that you can locate your drill properly
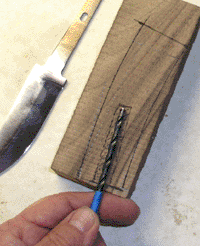 Use a drill that is a little thicker than the tang and mark of the depth you
require to drill.
Use a drill that is a little thicker than the tang and mark of the depth you
require to drill.
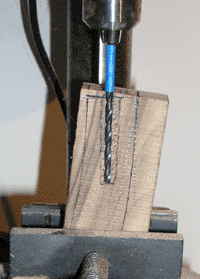 Clamp the block of wood in position so that the drill down is true. Then drill.
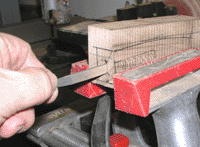 Expand the hole until the tang fits correctly, grind the tang if it helps, sand
end to angle.
Expand the hole until the tang fits correctly, grind the tang if it helps, sand
end to angle.
 Measure the thickness of the steel for the ferule.
 Mark the depth on the chosen metal allow extra so that the shape can be perfected.
 Use centre lines to transfer your measurements marking the ultimate ferule shape.
 Drill
and file out the ferule, you should take extra care not to make this hole to
large, test and re test until the ferule fits perfectly, gently tap into position
if required. Plan and cut out your spacers, keep assembling and checking the
fit.
Drill
and file out the ferule, you should take extra care not to make this hole to
large, test and re test until the ferule fits perfectly, gently tap into position
if required. Plan and cut out your spacers, keep assembling and checking the
fit.
![]()
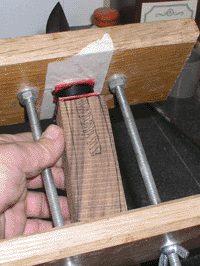
 I
have made up a simple clamp from old oak floor boards some threaded bar, nuts
and wing nuts. Cut a slot in the centre of the base of the clamp. Push the blade
through with the ferule resting on the wood, I often use some masking tape to
protect the surfaces, a good tip is to smear a little oil on the front face
of the ferule, this will make it easier to clean off excess glue later on. Use
a good two part slow drying epoxy resin glue and assemble.
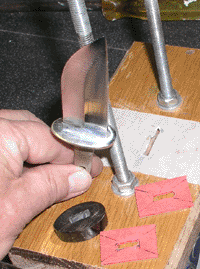
I
have made up a simple clamp from old oak floor boards some threaded bar, nuts
and wing nuts. Cut a slot in the centre of the base of the clamp. Push the blade
through with the ferule resting on the wood, I often use some masking tape to
protect the surfaces, a good tip is to smear a little oil on the front face
of the ferule, this will make it easier to clean off excess glue later on. Use
a good two part slow drying epoxy resin glue and assemble.
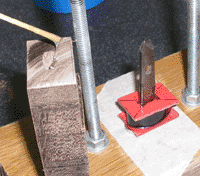
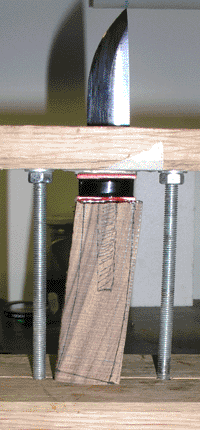 Tighten
up the wing nuts until the construction is straight and solid,
Tighten
up the wing nuts until the construction is straight and solid,
leave for the full drying time do not be tempted to start working too soon.
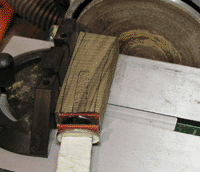 Remove from clamp, cover blade to protect the edge and yourself, sand to angle.
 Drill hole for cap fixing
 Fix end spaces and plates, bolt in with epoxy resin and allow to set.
 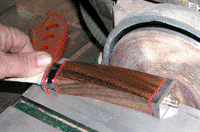 Shape to your handle markings.
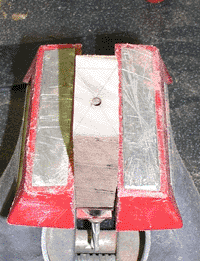
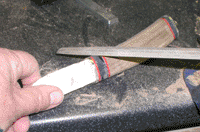 File, rasp and sand to refine the shape.
 When you have finished shaping, progressively sand down through the grades to
600 grit
When you have finished shaping, progressively sand down through the grades to
600 grit
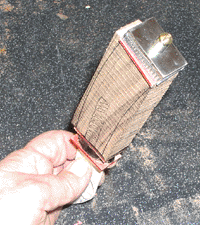
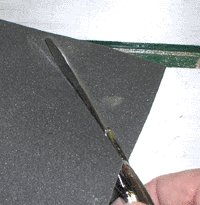
 To finish off use a CCL kit this produces a fantastic result.
Do not varnish the finish does not last.
| |
WWW www.english-handmade-knives.co.uk |